
This blog is a continuation of Part 1: Dynamics 365 for Finance and Supply Chain Electronic Reporting (not just for EFT). In part 1, we introduced electronic reporting and its potential uses.
Within this blog, we get technical! We give you detailed information and numbered steps on:
- Model mapping.
- How to create a model.
- How to create a model mapping.
- How to create a format.
Model Mapping
Once you have a data model, you can then create a model mapping for that model. A model mapping is how you map your data model to the source (or destination) data in Dynamics 365. Mappings can be direct to a table field, to an enum value, a label, or even calculations.
You can create multiple model mappings for different purposes and the mappings can relate to different parts of the data model.
For our example, we will create a simple mapping to map our invoice header and lines to the customer invoice tables in Dynamics 365.
Format
The “Format” is where you specify what the format of the output (or input) file should be. Here you specify the file type, what the structure of the file should be, what sort of delimiters you want (if necessary), what fields you want in each section, and the properties of each field (size, justification, padding, etc.).
In our example, we will create a simple csv file with indicators on each line to say whether it is a header or a line record.
Putting it all together
Now let us proceed with creating our example: we will include steps and screenshots used to create the scenario described above, but feel free to experiment, add your own elements, and even try some calculated fields.
Create a model
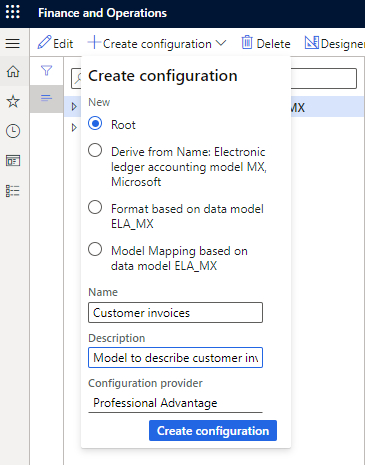
1. In the Electronic reporting configurations form, click on “Create configuration”.
2. Select “Root” and give it a name (e.g. “Customer Invoices”) and optionally a description.
3. The provider will be filled in automatically based on your active configuration provider, so make sure you have this set up as described above.
4. Click “Create configuration” at the bottom of the dialog.
5. A new root configuration will be created as follows:
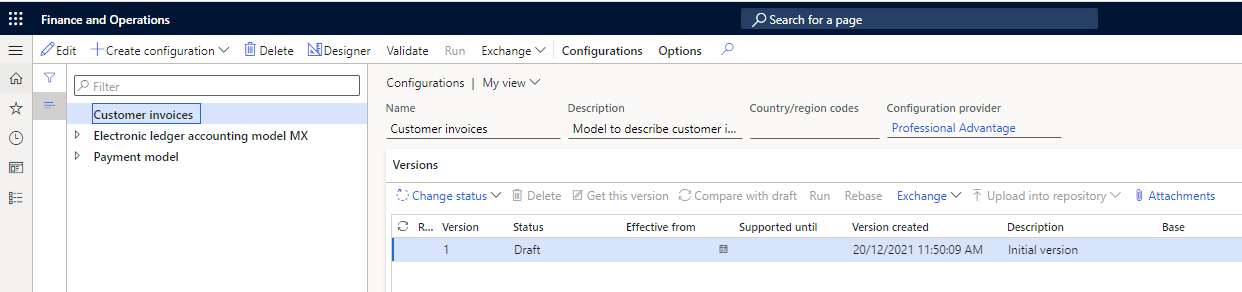
6. Click on the "Designer" button on the toolbar. This will open the designer form for this model, but it will be empty to start with.
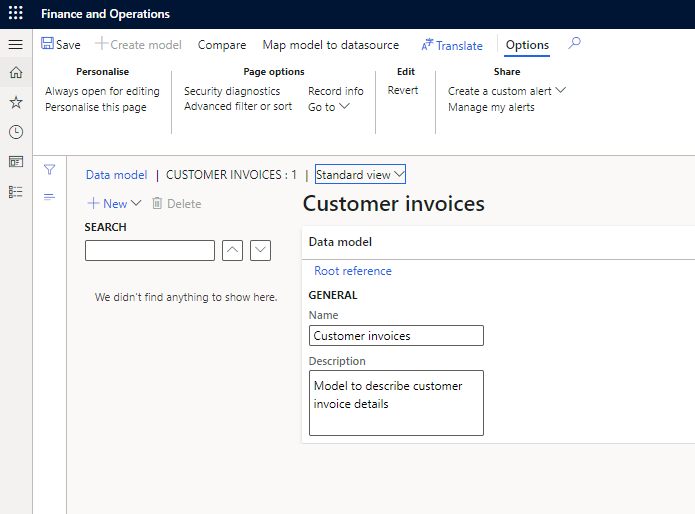
7. Click on the “New” drop-down to create a new model element. As this is an empty model there will only be one option: “Model root”.
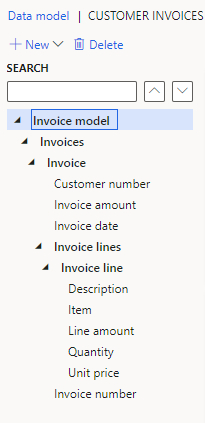
8. Give the root node a name that describes the entire model (e.g. “Invoice model”) and click “Add”.
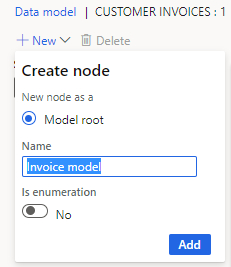
Note the “Is enumeration” option. We are not using this in this example, but this is where you can add your own enumeration types if you want.
9. With the top node selected, click “New” again and you will see that we now have an extra option.
10. Select “Child of an active node” and give it a name. This node will define the list of invoices, so we will call it “Invoices”.
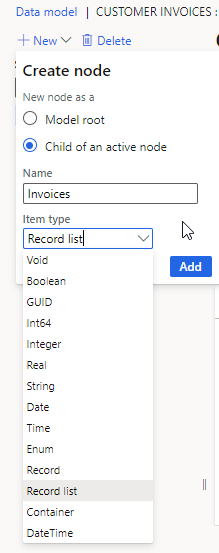
11. Select the item type drop-down and select “Record list”. Take a moment to look at the other node types that are available.
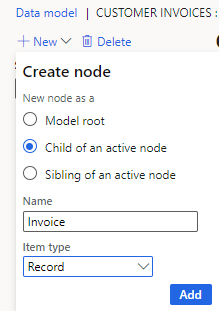
12. Select the Invoices node and click “New” again. This time we see that we have another option to add as a child, or as a sibling (i.e. at the same level). Select “Child of an active node”, select the item type of Record, and give it a name of the invoice.
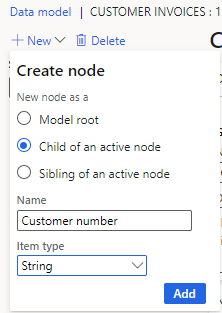
13. Note that the last item created is selected by default. Now we need to add header fields. Click New again, select "Child" and give it the name "Customer number", and select String as the type.
14. NOTE: some of the node parameters on the right. You can optionally specify a label and description for each node. These can be used later when we are outputting the format and can also help to describe the model. We will leave these out for now.
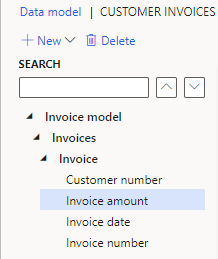
15. Click “New” again, and this time select “Sibling” as we want to add the next node at the same level as the Customer number. Give it a name of “Invoice number” and a type of String.
16. Repeat these steps to add the Invoice date and Invoice amount. (Remember to select a suitable type)
17. Your data model should now look like this:
18. Note that the nodes are ordered alphabetically, and you cannot change this. It doesn’t matter as this is only describing the model and we can specify the field order later when we create an output format.
19. Next, we will create our invoice lines. This will be a similar process as above.
20. Create a Child from the Invoice node with type “Record list” and name “Invoice lines”.
21. Create a Child from the Invoice lines node with type “Record” and name “Invoice line”.
22. Create a Child from the Invoice line node with type “String” and name “Item”.
23. Create a Sibling from the Item node with type “String” and name “Description”.
24. Continue to create Quantity, Unit price, and Line amount.
25. Your model should now look like this.
26. Save your model and return to the previous screen. Note, if you are working on a complex model, we recommend saving regularly so you don’t risk losing your work.
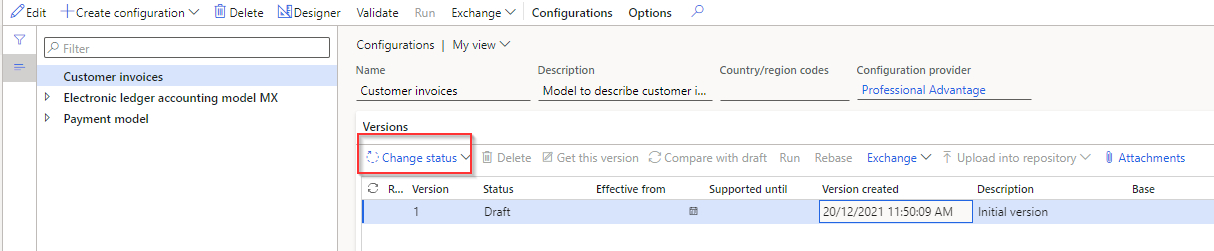
27. Before you can use your model with other elements you need to change the status to “Complete” using the Change status button highlighted below. When you complete your model a new draft version will be created in case you wish to make further changes.
Create a model mapping
The next step is to map the data model to the source data in Dynamics 365 using the model mapping.
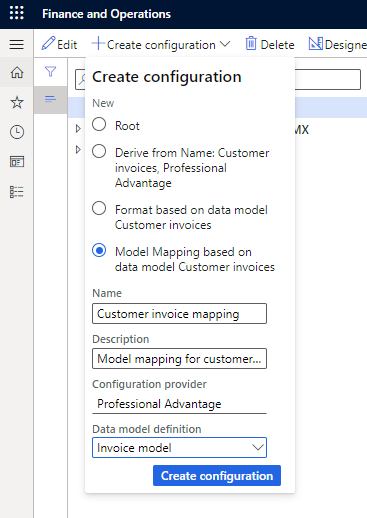
1. Select the “Customer invoices” data model and click the “Create configuration” button.
2. Select the option to create a model mapping.
3. Give the mapping a name and description.
4. Specify the data model definition. We will only have one to choose from, but if you have a complex model with multiple root nodes then you can select the root node that you want to map.
5. Click “Create configuration” at the bottom of the dialog.
6. Click on the “Designer” button to see a list of the mapping definitions (only 1) and click the “Designer” button on the list form to edit the mapping design.
7. The designer form shows three main sections: the available data source types to use in mapping, the data sources that you have selected, and the data model that you defined in the previous step.
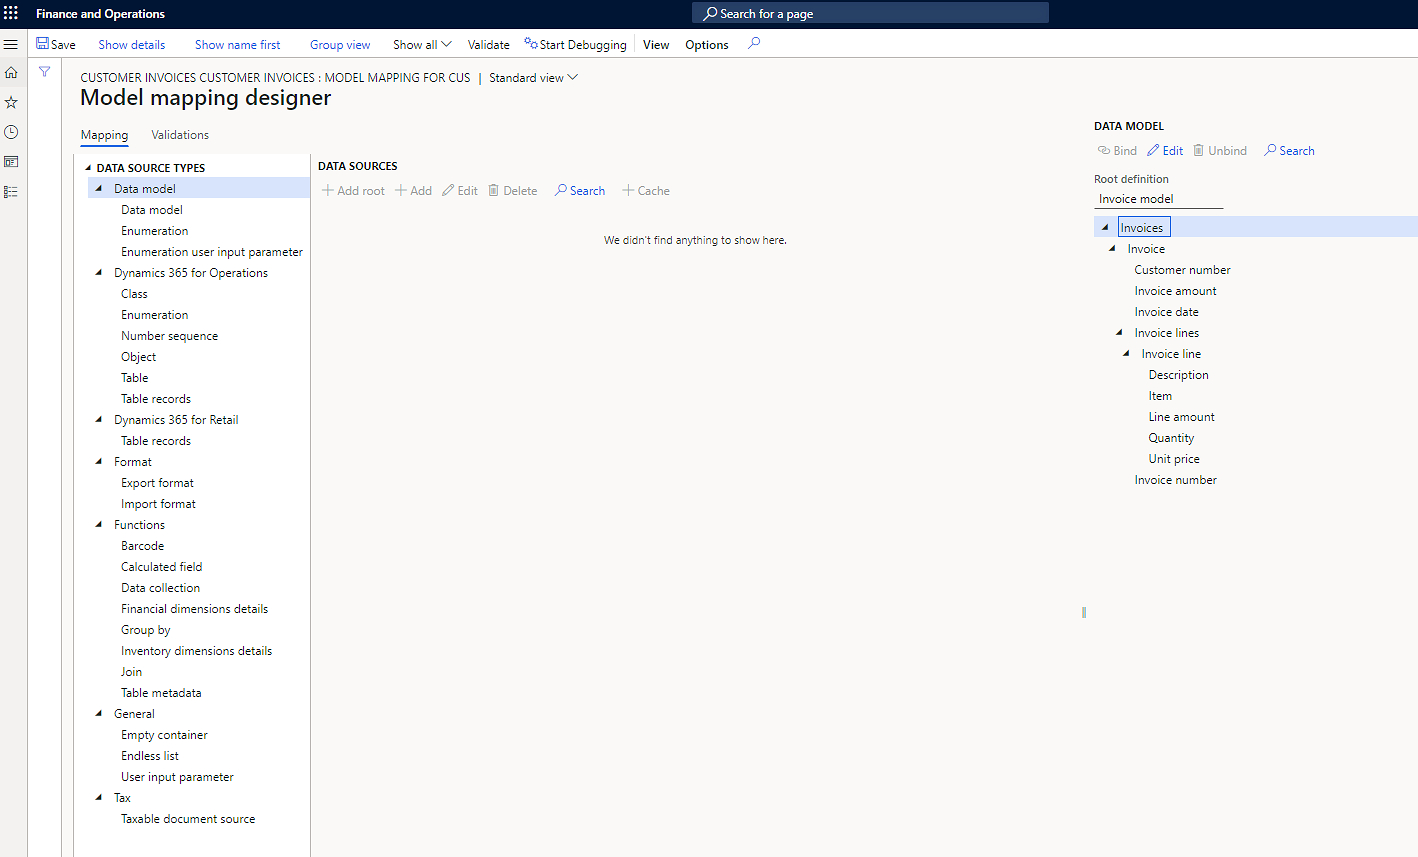
8. The first thing to do is to add our customer invoices data source.
9. Select “Table records” from the Data source types column. Don’t confuse this with “Table”, which lets you access metadata about the table.
10. In the Data Sources column, click “Add root”.
11. In the dialog that appears, specify a name for the data source (Invoices) and specify the table (CustInvoiceJour).
12. You can also select options at this point if you want it to be cross-company, if you want to ask for a query, or if it is an integration point. For now, just select “Ask for query”. This will let us select which invoices to include.
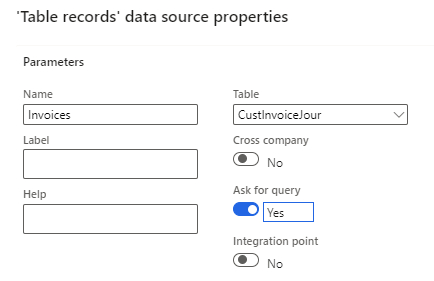
13. Click "OK".
14. Select the “Invoices” data source and in the data model column select the Invoices node and then click bind.
15. Expand the “Invoices” data source and find the field “Invoice account”. (Note the fields are listed alphabetically by label, not by field name, so sometimes you have to hunt for the field you want). In the data model column, select the Customer number field, and then click bind.
16. Repeat to bind the following fields to the data model:
- Invoice amount – Invoice amount.
- Date – Invoice date.
- Tax invoice - Invoice number.
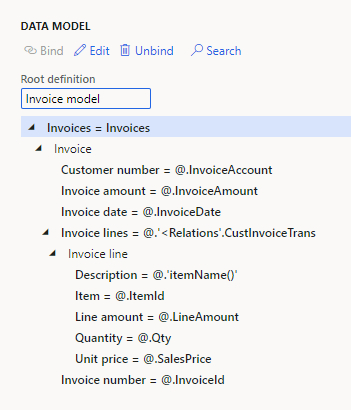
17. Your mapping should look like this:
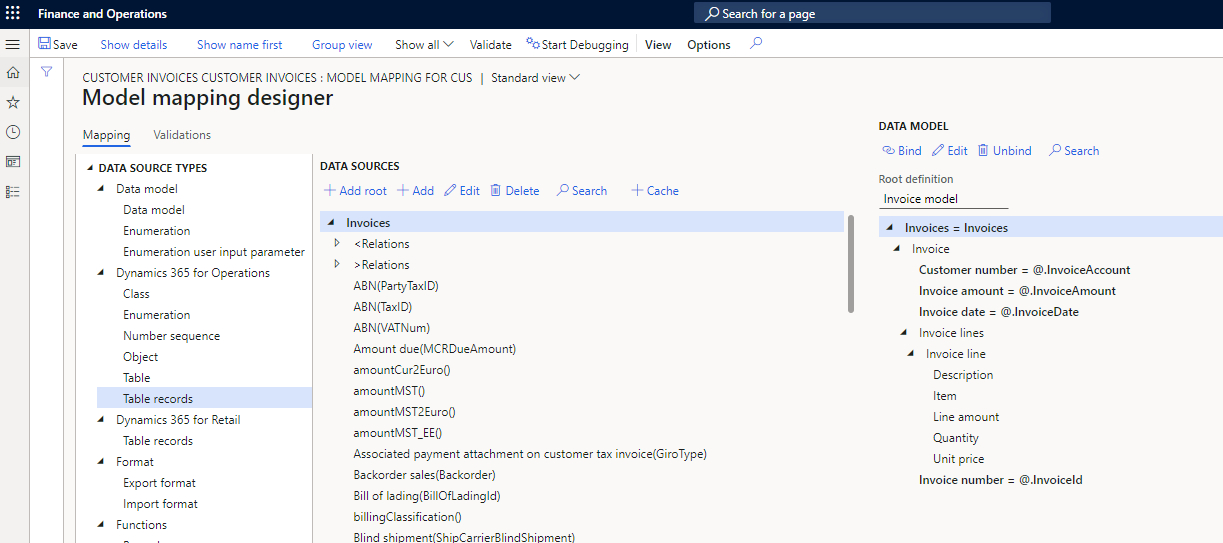
18. Next we will map the lines. Expand the invoice data source and then expand the node called “<Relations”. This lists all the tables that relate to the invoices table. In that list, find "CustInvoiceTrans" and select it. In the data model column, select the Invoice lines node, and then click "bind".
19. Expand the CustInvoiceTrans data source and bind the following fields like we did above.
- Item – Item.
- ItemName() – Description. (Yes you can map display methods too).
- Quantity – Quantity.
- Unit price – Unit price.
- Amount – Line amount.
20. Now your mapping looks like this:
21. Save your mapping and return to the front configurations form.
22. Select your model mapping and change the status to “Complete” as we did for the data model.
23. If you have multiple mapping configurations, you may need to mark one of the model mapping as the “Default for model mapping”.
Create a Format
The last step in our example is to create an output format.
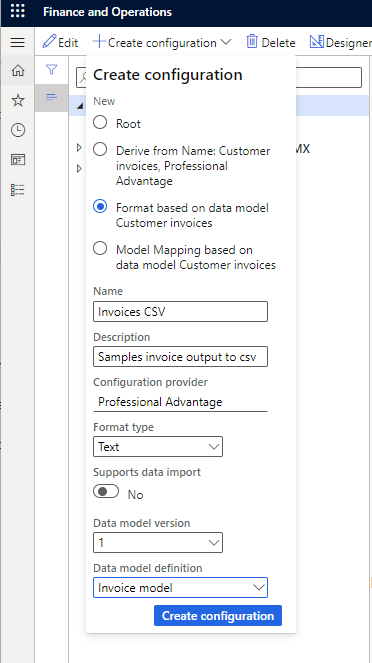
1. Make sure your data model (Customer invoices) is selected (not the model mapping).
2. Click on Create configuration and select “Format based on data model Customer invoices”.
3. Give it a name (e.g., “Invoices CSV”), a description, format type (Text in this case), data model version, and data model definition.
4. Leave the “Supports data import” option off in this instance.
5. Click Create configuration at the bottom of the dialog.
6. With the new format selected, go into the designer.
7. You will see two columns: the one on the left is for your output format, the one on the right is your data model. At the moment the format is empty.
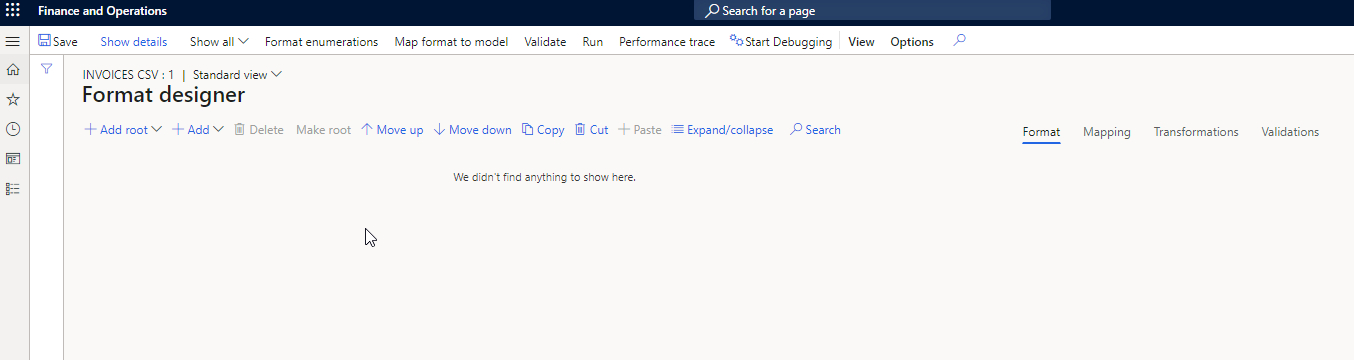
8. Notice there are four tabs over the right column: Format, Mapping, Transformations, and Validations. This blog only deals with format and mapping, but, as the names suggest, the others let you do additional transformations of values and validation of data.
The format tab needs to be active to define the format of our output file. Once the format is complete, we will switch to the mapping tab and map elements from our format to the data model. (Note there is no mention of model mapping here).
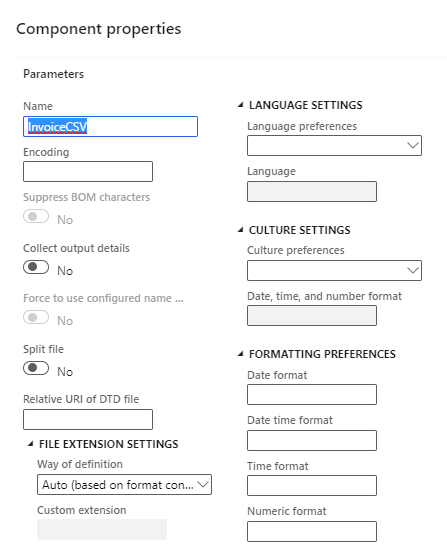
9. Click “Add root” and select File. Take time to notice the other options available.
10. In the dialog, specify the properties as required. The only required parameter is the name.
11. Click “Add” (not Add root) and select “Sequence”. Sequence is used whenever you have a repeating set of elements, e.g., records, fields, etc. Give it the name of “Content”. Notice in the dialog we can specify the delimiters we want to use. We can also change these settings later, but for now, just select the “New line” option under special characters and click "OK".
12. Think about how you want your file structured. In our case we want a header record for the invoice followed by line records for all the invoice lines, then another header record for the next invoice.
13. With “Content” selected, click Add and select sequence. Give it the name of “Header” and specify a custom delimiter of a comma (”,”).
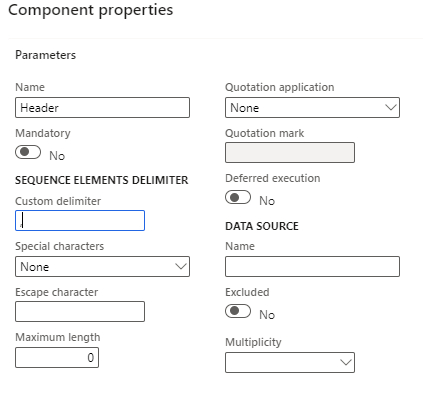
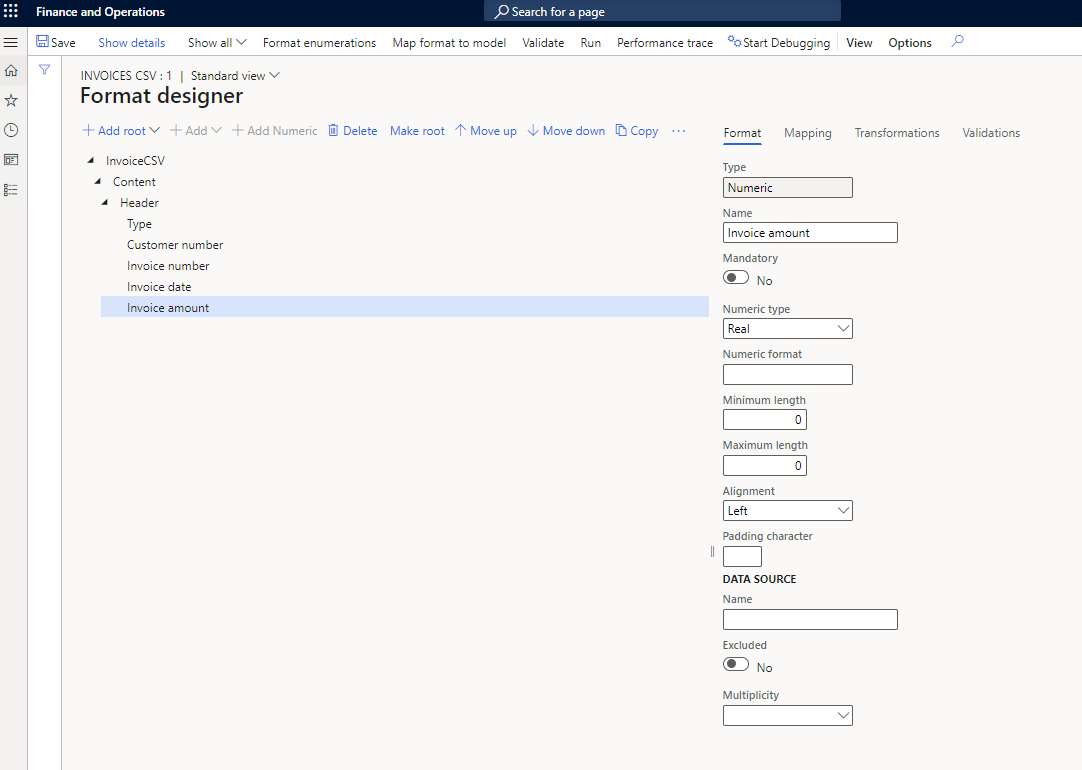
14. Select “Header” (Yes, in this designer view the last item created is not selected automatically, you will see why soon), click Add, and select String.
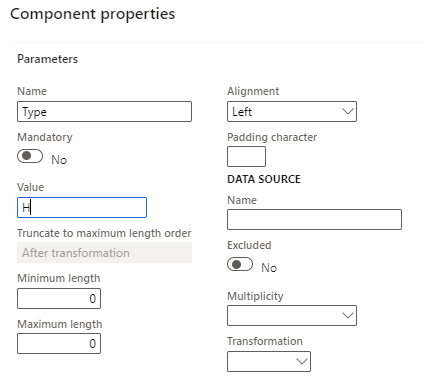
15. In the dialog give it a name of “Type” and in the Value, field enter “H” (H for Header). Note there are other options for specifying minimum and maximum field sizes and padding options. This is useful if you need to create a fixed-format file, but we will leave these empty for now.
16. Now add the other header fields. Just specify the name, leave all the other options as default. (See now why the item selected doesn’t change to the last item created!)
- Customer number.
- Invoice number.
- Invoice date.
- Amount.
17. For the date and amount fields you will use the DateTime and Numeric types. Notice that you have different options to specify the date format and numeric format.
18. After you have created all the header fields, click on each one and you will see the properties on the right. You can come back and change these at any point.
19. Your format should look like this.
20. Select the Content node again and add a new Sequence called Invoice Lines, specify the delimiter as a new line.
21. Select Invoice lines and add a new sequence called Line, with a delimiter of comma.
22. Select Line and add the line fields the same way we did for the header fields.
- Type (Value = “L”).
- Item.
- Description.
- Quantity.
- Unit price.
- Amount.
23. You can use the format property on the numeric fields to control the number of decimals if you wish, e.g., “#.00”.
24. Save your format (so you don’t lose all this hard work).
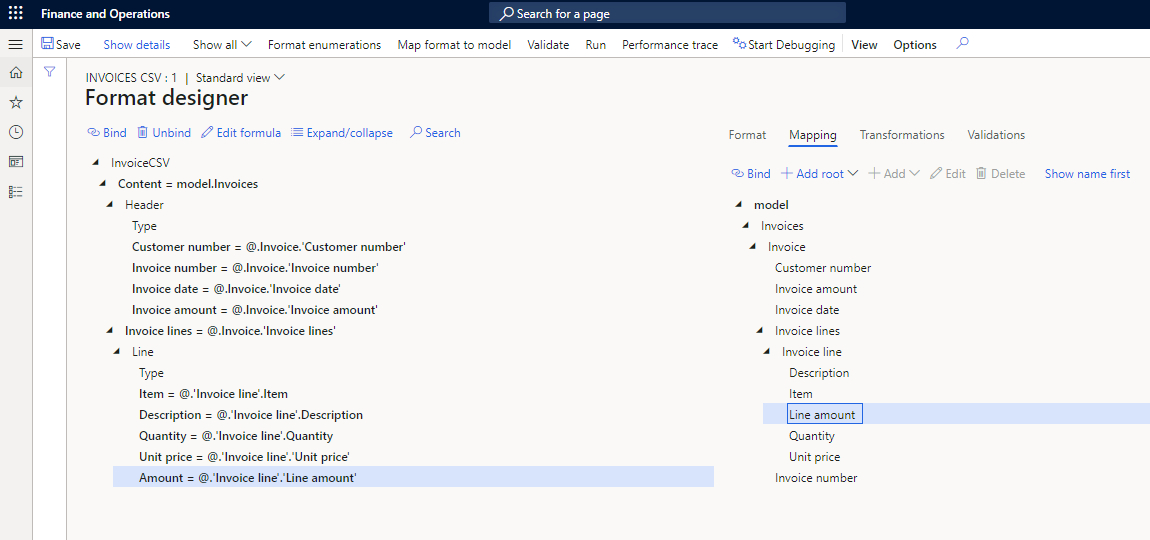
25. Now click on the mapping tab. You will see the properties on the right disappear and get replaced by our data model.
26. We need to specify which sequences correspond to the record lists.
27. Select “Content” in the format column and “Invoices” in the data model and click bind.
28. Select “Invoice lines” in the format column and “Invoice lines” in the data model and click bind.
29. Mapping the fields is easy; just select the field in the format, the corresponding field in the model, and click bind. Do this for all the header and line fields, except for the “Type” fields, which already have values of “H” and “L”.
30. Your format should look like this.
31. Save your format and now we are ready to test it.
32. In the menu bar at the top click run.
33. A dialog appears allowing you to select the records to include (think back to when we set up the model mapping). Make your selection (e.g., a sales order) so you don’t try to create a file with all invoices, and click "OK".
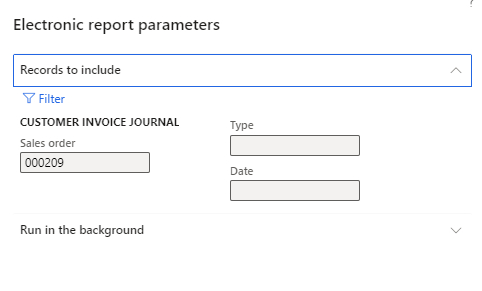
34. A file will be produced and downloaded to your browser with contents like the following:
H,US-004,CIV-000208,8/15/2015,81240.64
L,D0001,MidRangeSpeaker,7,480,3360.00
L,L0001,MidRangeSpeaker2,5,500,2500.00
L,P0001,AcousticFoamPanel,28,37,1036.00
L,D0003,StandardSpeaker,6,220,1320.00
L,T0001,SpeakerCable/Speaker cable 10,14,500,7000.00
L,D0004,HighEndSpeaker/High End Speaker,13,2000,26000.00
L,T0002,ProjectorTelevision,9,3750,33750.00
L,T0003,SurroundSoundReceive,7,450,3150.00
Conclusion
We hope this has given you a taste of what electronic reporting can do. There are many more options to explore, including calculations, advanced record operations including grouping, controlling output destinations, business documents and using ER for importing data... but that is for a future blog.